- Census Report Block
Census Report Block
Census Report Block
The Census Report block for Moodle 2 is used by an institution that needs to generate a report of student enrollment and completion status. An example is a college district that gets reimbursement from the state for all the full time equivalent students and needs to generate a report that reflects this.
Census Report Block Settings
Once the Census Report block is added to the site and enabled, the next step is editing the settings. The settings can be accessed by going to the Settings block > Site Administration > Plugins > Blocks > Census Report.
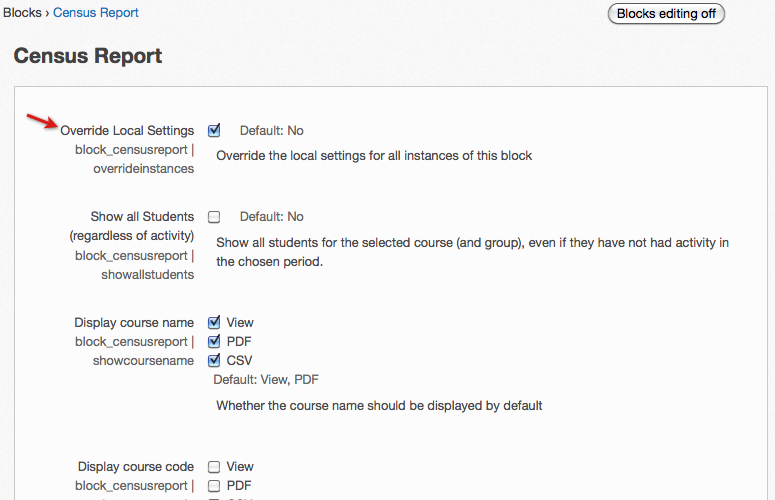
Enabling the first setting, Override Local Settings, will override the local settings for all instances of the block. If the first setting isn't enabled, then settings 2-9 must be set for each instance of the block by selecting the Configure icon after adding the block.
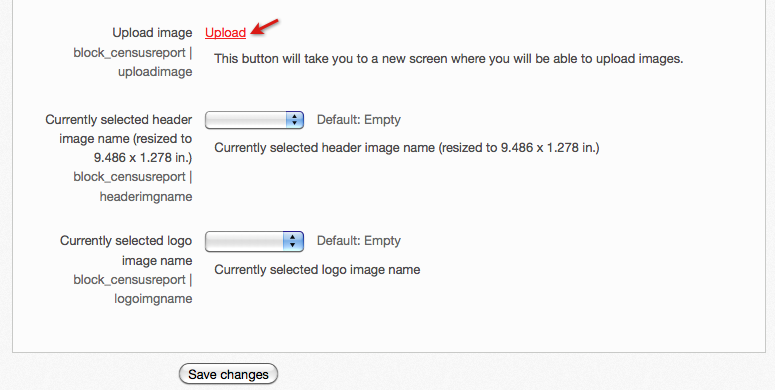
Header and footer logo images can be uploaded and selected on the bottom of the settings screen, shown in the next image. The selected images will be shown on all PDF versions of the Census Report, even if the first setting described above isn't enabled.
Selecting the Upload link opens a screen for uploading images.
First select the image type, choose Header or Logo (footer logo). Select the Choose a file button to upload an image or drag and drop an image on the box below the button. Save changes when finished.
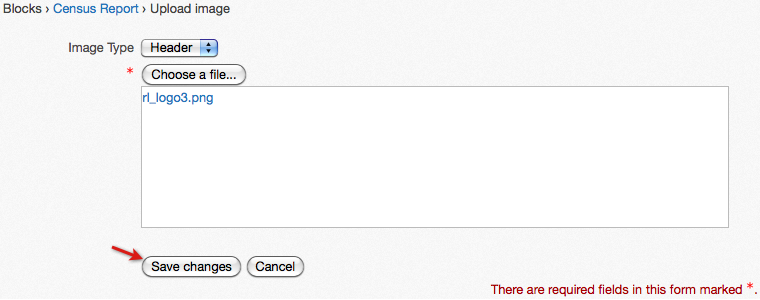
When creating a header image remember header images will be resized to 9.486 x 1.278 in. Currently the footer logo image will extend past the bottom of the page if it's too large, resizing or a warning will be added to the logo image setting in an upcoming version of the Census Report.
Once images have been uploaded they can be selected. In the following image, the header image that was just uploaded is being selected. This header image will now be shown at the top of all the PDF version of the Census Report.

Using the Census Report Block
The Census Report block can be added to the site Home page and to courses. When the block is added to a course, a report can only be generated for that course. When the block is added to the home page, you select one course to generate the report for. For this example we will be accessing the Census Report block from the site home page.
To Add the block go to the Settings block > Front page settings and select Turn editing on. Go to the Add a Block block, and select the Census Report from the Add drop down menu.
On the Census Report block you can:
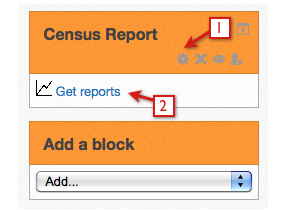
Selecting the Get Reports link opens the report filter.

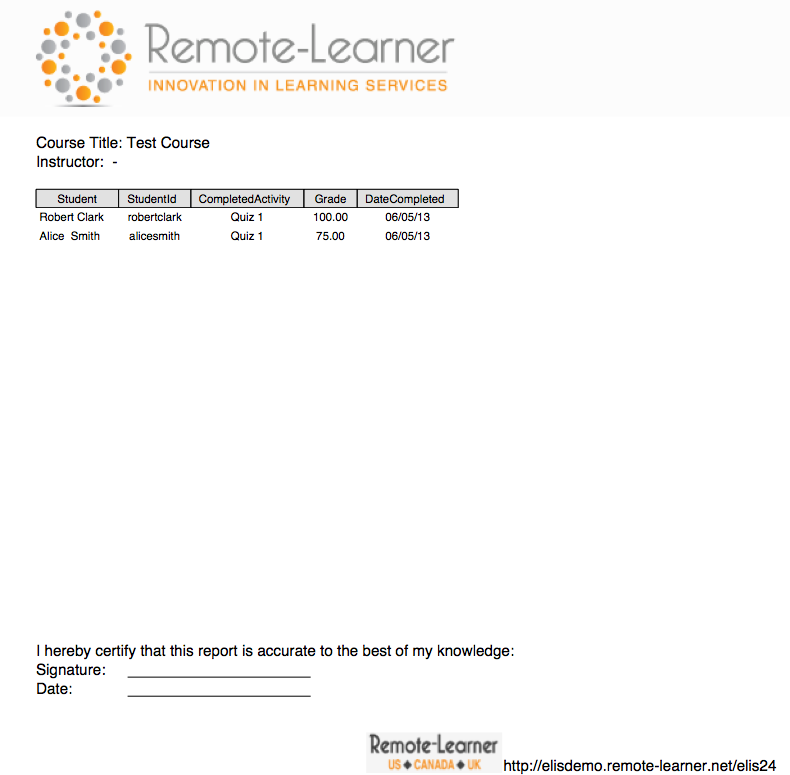
The PDF version of the report is shown in the next image. Notice the header image at the top of the report and the footer logo image at the bottom of the report. With other Census Report block settings the Course Title, Instructor, Signature, and Date fields were added. The report table automatically includes the Student name, Completed Activity, Grade, and Date Completed fields - the Student ID field was added with the settings.
Census Report Block Settings
Once the Census Report block is added to the site and enabled, the next step is editing the settings. The settings can be accessed by going to the Settings block > Site Administration > Plugins > Blocks > Census Report.
Enabling the first setting, Override Local Settings, will override the local settings for all instances of the block. If the first setting isn't enabled, then settings 2-9 must be set for each instance of the block by selecting the Configure icon after adding the block.

Header and footer logo images can be uploaded and selected on the bottom of the settings screen, shown in the next image. The selected images will be shown on all PDF versions of the Census Report, even if the first setting described above isn't enabled.
Selecting the Upload link opens a screen for uploading images.

First select the image type, choose Header or Logo (footer logo). Select the Choose a file button to upload an image or drag and drop an image on the box below the button. Save changes when finished.

When creating a header image remember header images will be resized to 9.486 x 1.278 in. Currently the footer logo image will extend past the bottom of the page if it's too large, resizing or a warning will be added to the logo image setting in an upcoming version of the Census Report.
Once images have been uploaded they can be selected. In the following image, the header image that was just uploaded is being selected. This header image will now be shown at the top of all the PDF version of the Census Report.

Using the Census Report Block
The Census Report block can be added to the site Home page and to courses. When the block is added to a course, a report can only be generated for that course. When the block is added to the home page, you select one course to generate the report for. For this example we will be accessing the Census Report block from the site home page.
To Add the block go to the Settings block > Front page settings and select Turn editing on. Go to the Add a Block block, and select the Census Report from the Add drop down menu.
On the Census Report block you can:
- Select the Configure icon to edit the settings for this block, unless the setting Override Local Settings was enabled at the Settings block > Site Administration > Plugins > Blocks > Census Report.
- Select the Gets Reports link to open the report filter.

Selecting the Get Reports link opens the report filter.
- Select the course to generate the report for.
- Select the date range for the report. The first completed activity for each student in the date range selected is shown in the report. For this example only students that have completed an activity during the selected date range will be shown.
- Select the Action. View the report, or download a PDF or a CSV version of the report.
- Select the Get Report button to generate the report.

The PDF version of the report is shown in the next image. Notice the header image at the top of the report and the footer logo image at the bottom of the report. With other Census Report block settings the Course Title, Instructor, Signature, and Date fields were added. The report table automatically includes the Student name, Completed Activity, Grade, and Date Completed fields - the Student ID field was added with the settings.
