Data Hub 2.0
Importing Course Information
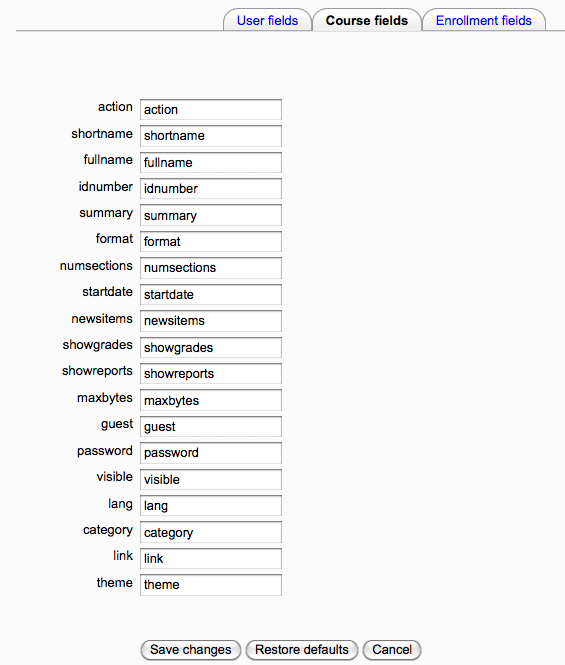
The Course tab is where you can set the import parameters for course information. Go to the Administration block > Site Administration > Plugins > Local plugins > Data Hub plugins > Version 1 import > Field mapping.The course properties mapping table enables you to map the names of course properties from your export file to properties in Data Hub. Any of these parameters can be set or updated via the Data Hub import file.

If you make changes to the property values, be sure to save your changes with one of the save buttons on the bottom of the screen.
The properties that can be set via the course csv file are listed below with brief descriptions:
| action: | The actions for courses are create, delete, or update. |
| shortname: | The course shortname. |
| fullname: | The fullname of the course. |
| idnumber: | The course id number. |
| summary: | Enter the summary. |
| format: | The course format, e.g., topics or weeks. |
| numsections: | The number of topics or weeks. If this optional field is used in the csv file, a value must be put in for each course. |
| startdate: | Enter the start date, e.g., 09/05/2010 (MM/DD/YYYY). |
| newsitems: | Enter how many news items will be shown, 0-10. |
| showgrades: | Enter yes or no. A number format will also work, enter 1 for yes or 0 for no. |
| showreports: | Enter yes or no. A number format will also work, enter 1 for yes or 0 for no. |
| maxbytes: | The maximum upload size for files in the course. Currently the site default will be used for this setting, not the value entered in the file for this field. |
| guest: | Enter yes or no for guest access to the course. A number format will also work, enter 1 for yes or 0 for no. |
| password: | Enter password if one is used. |
| visible: | Enter yes or no in the visible column to set the course visibility or availability. A number format will also work, enter 1 for yes or 0 for no. |
| lang: | Set the course language. Enter the language as it is shown in the Moodle course, e.g., English (en_us). Currently the site default will be used for this setting, not the value entered in the file for this field. |
| category: | The course category, e.g., miscellaneous. If the category name in the file hasn't been created yet the file will create the new category/sub-category. |
| link: | Enter the shortname of the template course in the link column of the csv file, if a template course is being used. The next page has more information about creating courses using templates. |
| theme: |
- category
- fullname
- shortname
- action
Data Hub Actions
DH tells Moodle what needs to be done with imported data via the Actions column. The following actions can be performed for courses:
- create - create a course
- delete - delete a course
- update - update a course.
In the Category column, /, designates a sub-category. For example, in row 2 Templates is a sub-category of OSHA Courses. If the category name in the file hasn't been created yet the file will create the new category/sub-category.

When deleting courses all 4 of the required fields must be included. Line 5 of the in the image is deleting a course.
Select this link to download the csv file shown in the image above.
Note that the courses in rows 4 and 5 were added to the site before the file was processed.Course CSV file FAQ:
- Does the .csv file have to contain all headers/columns?
No, just the required headers and the headers for data you want to change. - If we leave a field blank, does it override current data or ignore it?
Blank fields in non-required columns are ignored. - Can we use the course ID number for the course template feature or does it have to be the short name?
The template course's shortname is what is used for identifying the template course. - Can we include assigning the teacher to that role in the course to this file, or does it have to be a separate file?
All role assignments are done via the enrol.csv file, and not by the course.csv file. - Can we create courses that are not enroll-able?
Currently there isn't a method to set courses as not-enroll-able via DH - instead you can create courses and set them to invisible, then run an update and make them visible.
Importing/Processing DH Files
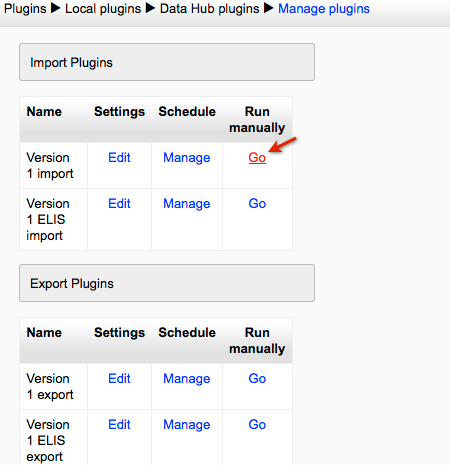
Course files can be processed manually or can be scheduled to automatically process. Manual processing should be used for testing small files only, for more information about scheduling files to process select this link. To manually process files go to the Administration block > Site Administration > Plugins > Local plugins > Data Hub plugins > Manage Plugins. Under the Version 1 import section select the "Go" link in the Run manually column.

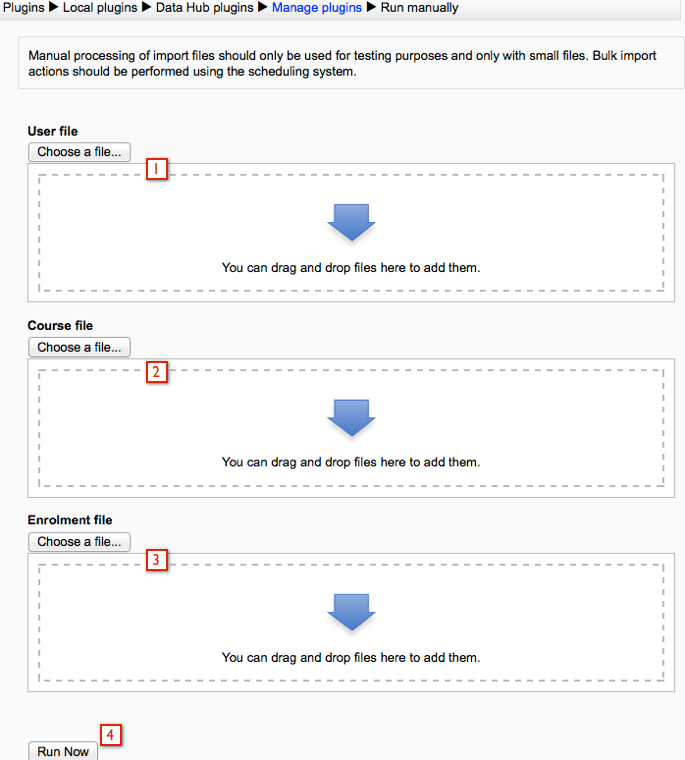
Next to (2) Course file select the "Choose a file" button to select a file to upload or drag and drop a file onto the space. Then select the Run Now button.

Once the file is processed there will be a brief log message stating whether or not the file import was successful.
A complete log of all actions is kept in the logs file, as well as (optionally) emailed to an address or addresses each time the DH script runs. You can also view/download logs by going to the Administration block > Site Administration > Reports > Data Hub logs link.
For information about scheduling imports to automatically process go to this page Importing/Processing Files.